
 Our mission is to lead innovation by providing the most advanced solutions in reliability and sustainability to empower…
 REC is looking to the future by aligning business goals with Saudi Arabia’s 2030 Vision. Part of this is investing in our young people and their future.
 Reliability Expert Center was established with the strategic vision of spreading a reliability and sustainability culture across Saudi Arabia.


Download Example BOM File DR Thermostat BOM (*.xls)
There are times when you have external data that you need to analyze in Lambda Predict. This example will guide you through the basic techniques for importing system configuration data from an external “bill of materials” file (BOM) into Lambda Predict. In this case, the BOM data is in an Excel® file.
Note that the sample BOM file in this example was designed for the Telcordia SR-332 Issue 2 standard. If that standard is not included in your software license you can use any other standard available to you, but keep in mind that only the first eight data fields in the file can be mapped correctly. The rest of the fields may not have appropriate matches in the standard you are working with.
Before you start the import process, you must first create an import template. Import templates help you match the parts data in your BOM file to the properties in the prediction standard you are working with, so that your data are imported into the correct fields. In this example, you will use the automatic mapping process to create an import template. Follow these steps:
Step 1: First, examine the sample BOM file and take note of the name of the Excel worksheet that contains the data and the row number where the column header names are stored.
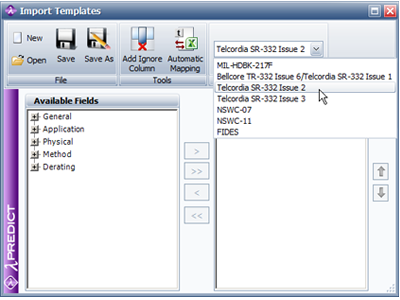
Step 2: Create an import template by choosing Home > Templates > Import Templates.

In the Import Templates window, choose the Telcordia SR-332 Issue 2 prediction standard (or any other standard that is available to you if the Bellcore/Telcordia standards are not included in your software license).
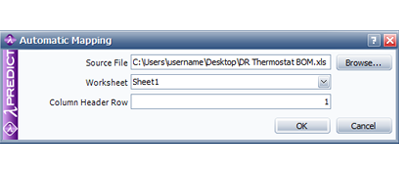
Step 3: Click the Automatic Mapping icon. In the Automatic Mapping window, click the Browse button to search for the sample BOM file you downloaded, and then use the information from Step 1 to populate the Worksheet and Column Header Row fields, as shown in the following example. Click OK.
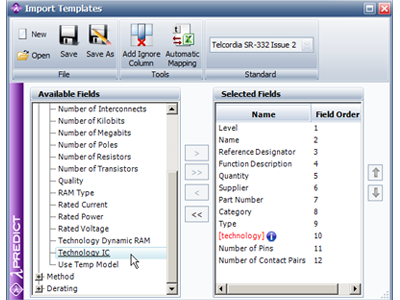
Step 4: Lambda Predict will attempt to match the column header names found in the Excel file to the fields used in the selected prediction standard. The results will be displayed in the Selected Fields area. Any column header names that do not have a match will be displayed in red text with an Info icon  next to it.
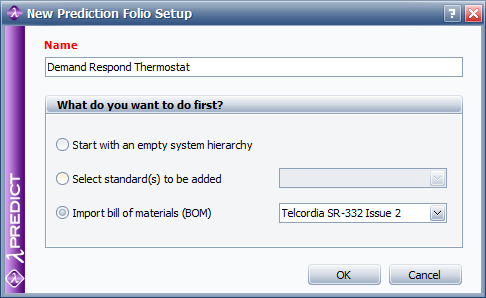
Click OK to create the prediction folio. Because you specified that you will be importing the system configuration data from a BOM file, the Import BOM Wizard will appear automatically once the folio is created.
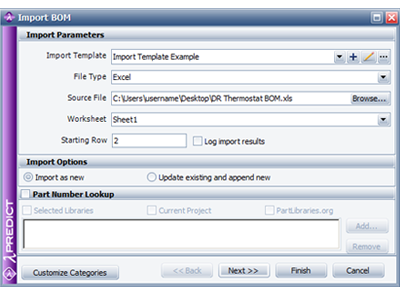
Step 8: In the Import BOM Wizard, enter the following information:
Once you have created the required import template, follow these steps to import the sample BOM data into Lambda Predict:
Step 6: Create a prediction folio by choosing Insert > Project Item > Prediction Folio.

Step 7: In the setup window, type a name for the folio in the Name field, then select the Import bill of materials (BOM) option and choose the prediction standard you will be working, as shown in the following example.